Writing Kibana plugins, part 1: Plugin Basics
Tags: Kibana

Kibana is an Open Source software to explore and visualize data stored in Elasticsearch. It provides a plugin system to allows developers to add new functionality. However, there has always been a shortage on good tutorials that demonstrate how to build Kibana plugins from scratch. This is especially true since Elastic decided to switch to a completely new architecture for Kibana in 2020, called "New Platform".
This article series provides you with a quick start on how to develop your own plugins for Kibana, using the "Kibana New Platform" architecture. The first two parts cover the basics regarding setting up the development infrastructure and a skeleton project for the plugin. The next parts will cover working with data stored in Elasticsearch.
The prerequisites
: acquaintance with Elasticsearch and Kibana, basic Unix command line skills, knowledge of JavaScript, and ReactJS.Environment
First, we need to set up a development environment. The main components of the environment are of course Elasticsearch and Kibana.
Setup
First clone the Kibana repository from GitHub into a new directory
$ git clone git@github.com:elastic/kibana.git && cd kibana
Next, checkout the the latest production-ready branch, for example 7.12:
git checkout 7.12
Kibana is a Node.js application. In order to find out which Node.js version you require, run:
$ cat .node-version

14.16.1
Install the required Node.js version. We recommend using NVM because the required Node.js version will change with time, and you probably want to support your plugin for multiple Kibana versions.
Kibana uses yarn as package manager. If you do not have yarn already installed, please follow the download and installation instructions on the yarn documentation.
Next, install all required packes for running Kibana. This step requires some time to complete, so be patient!
$ yarn kbn bootstrap
Kibana comes with scripts to download and run Elasticsearch. Execute the following command:
$ yarn es snapshot --license oss
Also, you can run
yarn es to list all available command options.Next, start Kibana in the open-source mode.
$ yarn start --oss
Also, you can run
yarn kbn to list all available command options.Kibana configuration
If you have need to use specific configuration settings for Kibana in the development mode, put it in kibana/config/kibana.dev.yml.
Creating your first plugin
First, create the plugins folder inside Kibana:
$ mkdir plugins
You can then use the Kibana plugin generator to create a simple plugin skeleton. You need to answer a list of questions before the plugin code is generated. With the settings used in this tutorial, the generator will create a plugin capable of working both with the frontend and the backend of Kibana.
$ node scripts/generate_plugin.js
? Plugin name (use camelCase) sgKibanaDemoPlugin
? Will this plugin be part of the Kibana repository? No
? Should an UI plugin be generated? Yes
? Should a server plugin be generated? Yes
 succ �

      Your plugin has been created in plugins/sg_kibana_demo_plugin
Now start Kibana by running
yarn start --oss, wait some time for it to bootstrap, and then open Kibana in your browser. You can now see the generated plugin in the navigation bar: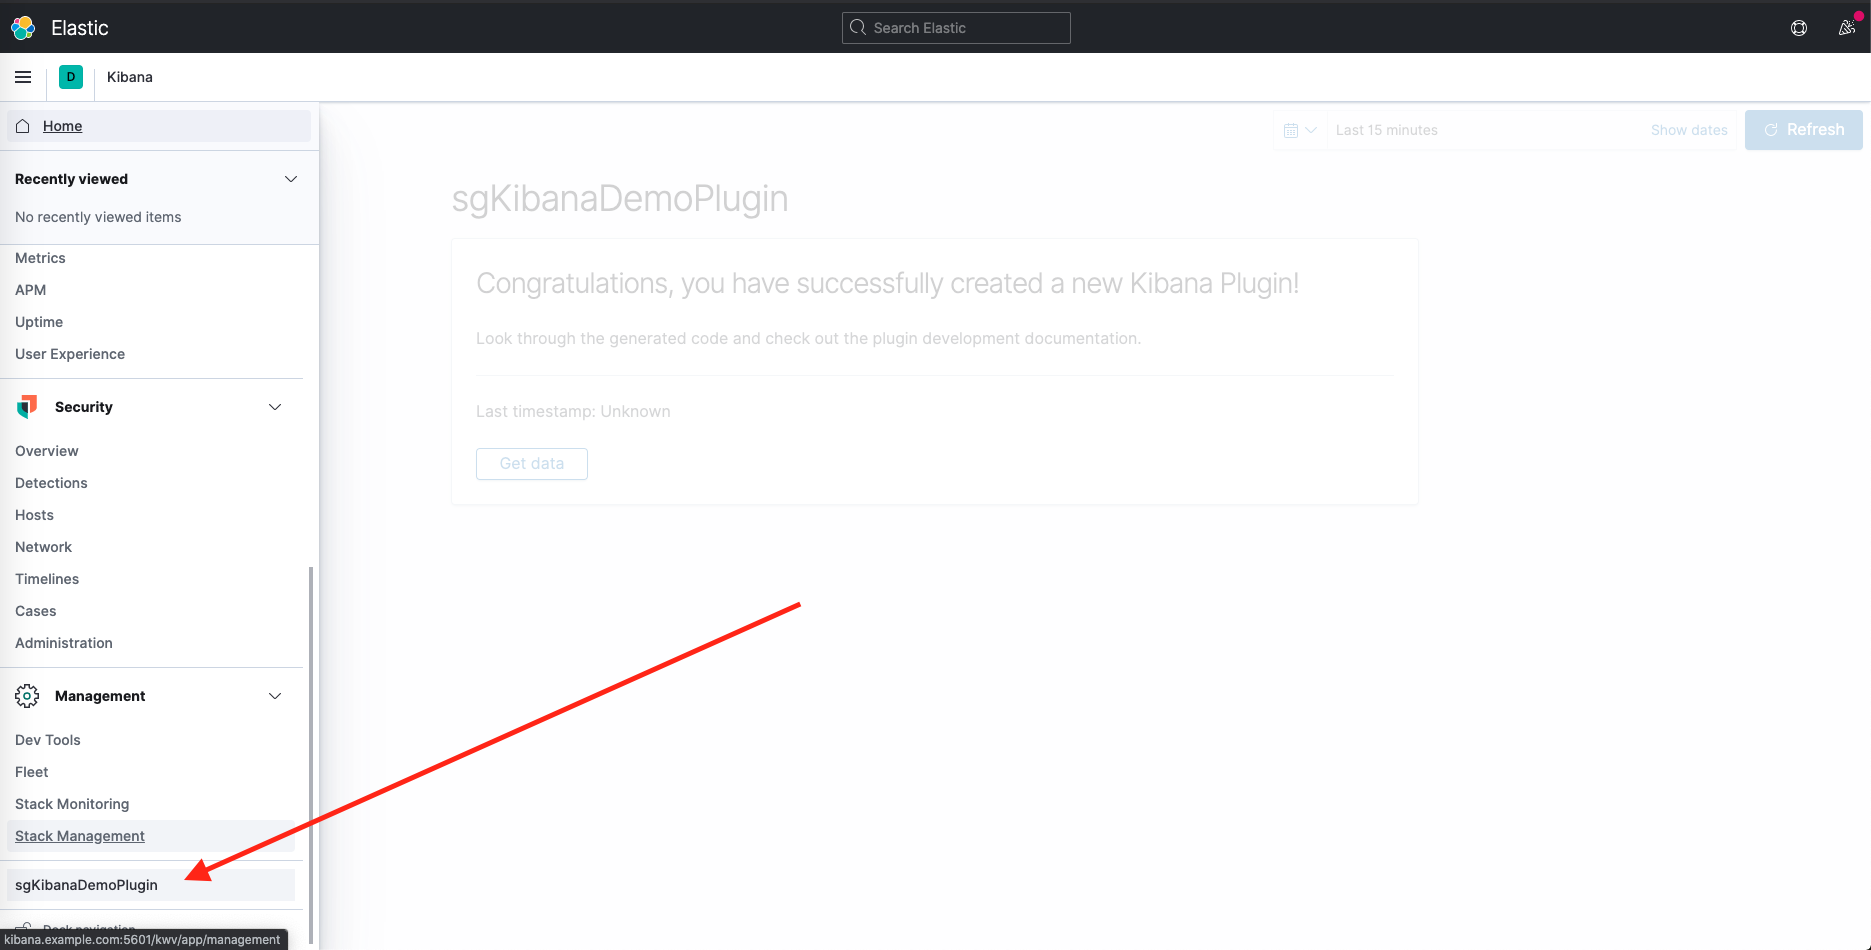
Plugin Structure
Let's discover the directory structure of our new plugin:
$ tree plugins/
plugins/
└── sg_kibana_demo_plugin
    ├── README.md
    ├── common
    │   └── index.ts
    ├── kibana.json
    ├── package.json
    ├── public
    │   ├── application.tsx
    │   ├── components
    │   │   └── app.tsx
    │   ├── index.scss
    │   ├── index.ts
    │   ├── plugin.ts
    │   └── types.ts
    ├── server
    │   ├── index.ts
    │   ├── plugin.ts
    │   ├── routes
    │   │   └── index.ts
    │   └── types.ts
    ├── target
    │   └── public
    │       ├── sgKibanaDemoPlugin.chunk.0.js
    │       ├── sgKibanaDemoPlugin.chunk.0.js.map
    │       ├── sgKibanaDemoPlugin.plugin.js
    │       └── sgKibanaDemoPlugin.plugin.js.map
    ├── translations
    │   └── ja-JP.json
    └── tsconfig.json

9 directories, 20 files
Overview
common
this folder contains code that is used both by public and server code
public
this folder contains all frontend-related code of the plugin, like React.js components, stylesheets and assets. You can write the code either in TypeScript or JavaScript
server
the folder server contains code that runs at the Node.js level, e.g. code for calling the Elasticsearch APIs.
translations
contains translation files to define localization for the plugin
Part 1: Summary
This finished the setup of our development environment. In this first part of the tutorial we have cloned Kibana from GitHub, switched to the most recent version, made sure we have the correct versions of Node.ja and yarn installed. We ran the Kibana bootstrap script to install all required packages, and we used the Kibana plugin generator to create a minimal plugin skeleton. Last, we ran Kibana and checked that our plugin was loaded and visible.
Where to go next
Read more about the main concepts and conventions for Kibana plugins
Kibana plugin development is a great way to add custom functionality and extend Kibana's use cases. Hopefully this article has given you the foundation you need to get started building your own plugins. If you run into any issues or have questions, feel free to reach out - we're always happy to help. Happy plugin developing!
Image: shutterstock / stokk
Published: 2021-04-30
Summarize this with AI
Questions? Drop us a line!
Other posts you may like

Writing Kibana Plugins - Part 2: A Skeleton Plugin
Jochen Kressin || 2022-12-08
We walk you through the initialisation and lifecycle methods of a Kibana plugin and explain the plugin's metadata
read more

Using Kerberos with Elasticsearch and Kibana
Cliff Stayley || 2019-01-16
How to setup Kerberos authentication for Elasticsearch and Kibana by using Search Guard, the enterprise security suite for Elasticsearch.
read more

Kibana Single Sign-On with OpenID and Keycloak
Jochen Kressin || 2018-07-12
Use Search Guard to implement Kibana Single Sign On with OpenID. Use your favorite identity provider like Keycloak, Okta or Auth0 with the Elastic stack.
read more